Battle of Gang Toi

Last updated

Battle of Gang Toi
Part of the Vietnam War
2LT Clive Williams giving orders SVN 1966 (AWM CUN660162VN).PNG
Second Lieutenant Clive Williams during orders with his section commanders.
Date8 November 1965
Location
Gang Toi Hills, Bien Hoa Province, South Vietnam (now in Dong Nai Province, Vietnam)
11°04′N106°58′E / 11.06°N 106.97°E / 11.06; 106.97 Coordinates: 11°04′N106°58′E / 11.06°N 106.97°E / 11.06; 106.97
Result Minor Viet Cong tactical victory
Belligerents
Flag of Australia (converted).svg  Australia
Flag of New Zealand.svg  New Zealand
Flag of the United States.svg  United States
FNL Flag.svg Viet Cong
Commanders and leaders
Flag of Australia (converted).svg Lou Brumfield
Flag of Australia (converted).svg John Healy
FNL Flag.svg Nguyễn Văn Bảo
Units involved
Flag of Australia (converted).svg A Company 1 RAR
Flag of New Zealand.svg 161 Battery, RNZA
Flag of the United States.svg 1/503rd Infantry
FNL Flag.svg Company 238
Strength
120 men unknown
Casualties and losses
Flag of Australia (converted).svg 2 killed 6 killed
5 captured

The Battle of Gang Toi (8 November 1965) was fought during the Vietnam War between Australian troops and the Viet Cong. The battle was one of the first engagements between the two forces during the war and occurred when A Company, 1st Battalion, Royal Australian Regiment (1 RAR) struck a Viet Cong bunker system defended by Company 238 in the Gang Toi Hills, in northern Bien Hoa Province. It occurred during a major joint US-Australian operation codenamed Operation Hump, involving the US 173rd Airborne Brigade, to which 1 RAR was attached. During the latter part of the operation an Australian rifle company clashed with an entrenched company-sized Viet Cong force in well-prepared defensive positions. Meanwhile, an American paratroop battalion was also heavily engaged in fighting on the other side of the Song Dong Nai.

Contents

The Australians were unable to concentrate sufficient combat power to launch an assault on the position and consequently they were forced to withdraw after a fierce engagement during which both sides suffered a number of casualties, reluctantly leaving behind two men who had been shot and could not be recovered due to heavy machine-gun and rifle fire. Although they were most likely dead, a battalion-attack to recover the missing soldiers was planned by the Australians for the next day, but this was cancelled by the American brigade commander due to rising casualties and the need to utilise all available helicopters for casualty evacuation. The bodies of the two missing Australian soldiers were subsequently recovered more than 40 years later, and were finally returned to Australia for burial.

Background

Military situation

Although the initial American commitment to the war in Vietnam had been limited to advice and materiel support, by 1964 there were 21,000 US advisors in South Vietnam. [1] However, with the Army of the Republic of Vietnam (ARVN) weakened by successive defeats at the hands of the communists, the South Vietnamese government faltering, and Saigon threatened with a major offensive, the situation led to a significant escalation of the war in 1965, with a large-scale commitment of US ground troops under the command of General William Westmoreland. [2] At first the Americans had adopted a cautious strategy, applied to the strictly limited role of base defence by US Marine units. This was abandoned in April 1965, and replaced by a new "enclave strategy" of defending key coastal population centres and installations. [3] This strategy required the introduction of nine additional US battalions, or 14,000 troops, to bring the total in Vietnam to 13. Allied nations of the Free World Military Forces were expected to contribute another four battalions. [4]

III CTZ, May to September 1965. III CTZ May to September 1965.jpg
III CTZ, May to September 1965.

Westmoreland planned to develop a series of defensive positions around Saigon before expanding operations to pacify the South Vietnamese countryside and as a result a number of sites close to Viet Cong dominated areas were subsequently chosen to be developed into semi-permanent divisional-level bases. Such areas included Di An which was intended to become the headquarters of the US 1st Infantry Division, while the US 25th Infantry Division would be based in the vicinity of Cu Chi. However, large-scale military operations to clear the intended base areas had to wait until the dry season. [5] Yet the allied enclave strategy proved only transitory and further setbacks led to additional troop increases to halt the losing trend. [6] With the situation reaching a crisis point during the Viet Cong wet season offensive in June 1965, Westmoreland requested further reinforcement and US and allied forces increased to 44 battalions which would be used to directly bolster the ARVN. [7]

Australia's growing involvement in Vietnam reflected the American build-up. In 1963, the Australian government had committed a small advisory team, known as the Australian Army Training Team Vietnam (AATTV), to help train the South Vietnamese forces. [8] However, in June 1965 the decision to commit ground troops was made, and the 1st Battalion, Royal Australian Regiment—originally commanded by Lieutenant Colonel Ivan 'Lou' Brumfield—was dispatched. Supporting 1 RAR was the 1 Troop, A Squadron, 4th/19th Prince of Wales's Light Horse equipped with M113 armored personnel carriers, artillery from the 105th Field Battery, Royal Australian Artillery and 161st Battery, Royal New Zealand Artillery, and 161st Reconnaissance Flight operating Cessna 180s and Bell H-13 Sioux light observation helicopters; in total 1,400 personnel. [9] [10] The Australian units and New Zealand artillery were attached to the US 173rd Airborne Brigade under the command of Brigadier General Ellis W. Williamson in Bien Hoa and operated throughout the III Corps Tactical Zone (III CTZ) to help establish the Bien Hoa–Vung Tau enclave. [11] [12] Although logistics and resupply were primarily provided by the Americans, a small logistic unit—1st Australian Logistics Company—was situated at Bien Hoa airbase. [9] Unlike later Australian units that served in Vietnam, which included conscripts, 1 RAR was manned by regular personnel only. [8]

Attached to US forces, 1 RAR was primarily employed in search and destroy operations using the newly developed doctrine of airmobile operations, utilising helicopters to insert light infantry and artillery into an area of operations, and to support them with aerial mobility, fire support, casualty evacuation, and resupply. [13] The battalion commenced operations in late June 1965 and initially focussed on defeating the Viet Cong's wet season offensive. During this time US 173rd Brigade, including 1 RAR, conducted a number of operations into War Zone D—a major communist base area at the junction of Phuoc Long, Long Khanh, Bien Hoa and Binh Duong provinces—as well as in the Iron Triangle in November. [14]

Prelude

Opposing forces

By late-1965 the junction of the Song Be and Song Dong Nai rivers had become a major communist staging area for men, equipment, and supplies for units based around Saigon and the Mekong Delta. Communist communications and resupply routes between War Zone C and D also met in this area. Westmoreland planned to use the US 173rd Airborne Brigade to keep the Viet Cong off balance and to target their base areas, and consequently a search-and-destroy operation codenamed "Operation Hump" was planned. [15] Operation Hump marked the half-way point in the twelve-month tour of duty of the 173rd Airborne Brigade and was named accordingly. [16] The concept of operations envisioned 1 RAR and the US 1st Battalion, 503rd Infantry Regiment being inserted by helicopter during an airmobile operation into War Zone D, in an area about 20 kilometres (12 mi) north-east of the Bien Hoa Air Base. The Australian and American area of operations (AO) was to be separated by the Song Dong Nai, with 1 RAR to deploy into a landing zone (LZ) to the south, while the 1/503rd would conduct a helicopter assault onto a LZ northwest of the Song Dong Nai and Song Be. [17] Meanwhile, the 173rd Airborne Brigade's second battalion—2nd Battalion, 503rd Infantry Regiment—would be left to defend Bien Hoa Air Base. [16]

The area was thought to be a Viet Cong stronghold and American intelligence initially identified Q762 Main Force Regiment and D800 Main Force Battalion as being nearby. [18] However, unknown to the allied force, the Viet Cong 9th Division had likely received forewarning of the operation and had deployed one of its most experienced regiments, supported by a number of local force battalions, determined for a test of allied strength. [15] The 271 Main Force Regiment (also known as Q761 Main Force Regiment) subsequently took up defensive positions in the area, while the communist U1 headquarters protected by Company 238, was situated on the plateau atop the Gang Toi Hills in an area which formed part of 1 RAR's objective. [19] [18] U1 was responsible for co-ordinating the Viet Cong regional defence against the Bien Hoa air base and for developing anti-government resistance and had been tasked with rebuilding the covert organisation in Bien Hoa city and the surrounding villages up to the Dong Nai, as well as re-establishing the link between Bien Hoa city and War Zone D, and for planning and executing attacks against the air base itself. Yet having relocated to the rainforest two months earlier, its presence was also unknown to the Australians and Americans. [20] Regardless, A Company 1 RAR was scheduled to conduct a search of the plateau on the fourth day of the operation. [21]

Battle

Insertion and patrolling, 5–7 November 1965

Battle of Gang Toi, 8 November 1965. Battle of Gang Toi 8 Nov 1965.png
Battle of Gang Toi, 8 November 1965.

On 5 November 1 RAR began the routine search-and-destroy operation, inserting by helicopter south of the Song Dong Nai at 08:00, while the 1/503rd was inserted onto LZ King north-west of the Song Dong Nai and Song Be rivers at 11:00. [17] The operation started badly for the Australians and Americans with the fly-in delayed. Despite a lengthy preparation by fire, a large Viet Cong force had been observed in the vicinity of LZ Queen prior to the insertion of the lead Australian rifle company—D Company under the command of Captain Peter Rothwell. The escorting helicopter gunships began taking small arms fire as they attempted to provide suppressing fire and Rothwell made the decision to activate the alternate landing zone to the north-east, LZ Princess. D Company was subsequently inserted safely and swept back to LZ Queen, securing it for the remainder of the battalion. By mid-morning 1 RAR occupied LZ Queen, with the 105 mm L5 pack howitzers of 105 Field Battery also flying-in to provide direct support. [22] Augmenting the Australian gunners, the US 3/319 Artillery Battalion and 161st Battery, Royal New Zealand Artillery occupied FSB Ace 4,000 metres (4,400 yd) further south. [23]

The scheme of manoeuvre adopted by 1 RAR dictated that each company undertake a dispersed patrol program in their own tactical area of responsibility, a fact which would allow them to search more ground, but limit their ability to concentrate combat power in the event of contact. A Company, under Major John Healy, patrolled east; B Company moved north along the Song Be to Xom Xoai, while D Company patrolled south. [23] C Company remained at LZ Queen to protect 105 Field Battery which had established a fire support base (FSB). [24] Over the next two days the Australians patrolled relentlessly through the leech-infested swamps and dense jungle. [23] At midday on 6 November A Company received two mortar rounds which failed to do any damage, but marked the start of a series of minor clashes. [24] A Company had a number of contacts during this time, with the Australians killing a Viet Cong scout for the loss of two wounded in one skirmish. A further contact soon after resulted in two more Viet Cong killed and one wounded. Intelligence gained from these incidents indicated the presence of a Viet Cong Main Force Regiment in the area, while documents recovered contained plans for attacks on ARVN outposts near Bien Hoa Air Base. [23]

By nightfall on 7 November, despite the earlier contacts, no major actions had occurred in the Australian AO. With the rifle companies now several kilometres apart, A Company had patrolled into a network of well used roads and tracks. Healy's men spent the night astride the tracks and would resume patrolling the following day along a track which led to Hill 82. [23] [25] Meanwhile, although unknown to them at the time, the US 1/503rd Battalion across the Song Dong Nai had patrolled to within 2,000 metres (2,200 yd) of a major Viet Cong bunker system sited on two spur lines in the vicinity of Hill 65. [23]

Hill 82, 8 November 1965

Brumfield arrived by helicopter on the morning of 8 November, just as A Company was preparing to depart from its night location at 08:00. [24] With contact now seeming unlikely to the Australians, Healy was instructed to move to a rendezvous from which the battalion would be extracted back to Bien Hoa the following day. [19] A Company subsequently set out on a compass bearing which would take them across the northern edge of the Gang Toi plateau. By 10:30 the Australians moved out in single file but had not gone far before a lone Viet Cong scout was observed shadowing them; he was subsequently shot and killed by the rear section. [26] Crossing a creek line the Australians uncovered a company-sized camp of dugouts and trenches, before being fired upon at 15:40 by a single Viet Cong soldier who then fled. A Company halted briefly, and at this time two Viet Cong approached their position, before being killed by 1 Platoon. [27]

The Australians continued in single file towards the top of the plateau, with 1 Platoon—under Sergeant Gordon Peterson—leading, followed by 2 and then 3 Platoon. The going was slow in the dense jungle and visibility was limited. By 16:30 the lead section was nearing the top of the hill having gone just 250 metres (270 yd), while the last platoon—3 Platoon—was still leaving the harbour. Suddenly, 1 Platoon was hit by heavy small arms fire from at least three Viet Cong machine-guns in well-sited bunkers, supported by rifles and grenades. The fire engulfed the lead section and platoon headquarters, causing five casualties in the opening minute. Pinned down, the Australians went to ground and began returning fire, allowing all except one of the wounded to crawl to safety. Private Richard Parker, who had fallen directly in front of the bunker system, was unable to be recovered. Failing to respond to the shouts of his comrades, Parker was exposed to further hits, although was probably already dead. To support the beleaguered platoon, Healy subsequently ordered the support section from company headquarters to move forward to provide covering fire, while 3 Platoon moved up on the left flank. [28] However, due to the dispersed patrolling plan adopted, the remaining companies were unable to provide any assistance. [29]

Still at the bottom of the hill, 3 Platoon—under Second Lieutenant Clive Williams—had just shot and killed two Viet Cong moving along the creek line. Reaching the top of the hill to the left of company headquarters, Williams turned to the right towards the Viet Cong positions. Moving into extended line on a 120 metres (130 yd) front the Australians had advanced just 50 metres (55 yd) before the left flank was engaged by a number of machine-guns from another sector of the Viet Cong position. [28] In danger of being outflanked, 3 Platoon continued to advance regardless, using fire and movement. Just 15 metres (16 yd) from the bunkers Private Peter Gillson, the machine-gunner in the forward section, was shot as he tried to move around the twisted roots of a tall tree. [28] As he fell two Viet Cong rushed forward to take the M60 machine-gun; however, Gillson was still conscious and they were killed at point blank range before he collapsed. Williams radioed Healy of the increasing danger while his platoon sergeant—Sergeant Colin Fawcett—had crawled forward under heavy fire to Gillson, whose body was wedged in the buttress of a large tree. Unable to find a pulse, Fawcett attempted to extract Gillson, but was unable to do so due to heavy fire. Two other attempts to recover the body were also beaten back, and although unsuccessful, Fawcett was later awarded the Military Medal for his actions. [30]

Taking heavy fire from both the front and flanks, Williams had little choice but to withdraw. With the Viet Cong moving rapidly to encircle them, and unable to move forward, the Australians had to fight using small arms fire and grenades to extract themselves back to company headquarters without further casualties. [31] However, by this time the artillery was beginning to have an impact as A Company's forward observer, Captain Bruce Murphy, a New Zealander, directed the fires. The Australians had unavoidably been placed in the worst possible position to their supporting artillery, with 105 Battery firing on a line directly towards them from their gun-line 4 kilometres (2.5 mi) on the other side of the Gang Toi plateau. Consequently, Murphy was unable to observe the fall of shot, and had to walk the rounds onto target by sound. A slight miscalculation could have sent a round over the hill into the Australian positions, regardless, and despite persistent rifle and machine-gun fire, Murphy calmly directed the artillery throughout the battle. For his skill and bravery he was later awarded the Military Cross. [31]

By 18:30, more than two hours since the fighting began, darkness was approaching. The battalion would be unable to concentrate against the Viet Cong position until the following day, and Healy subsequently made the decision to withdraw. [31] With the artillery falling as close as possible, the weight of the indirect fires provided the Australians with a degree of protection and an opportunity to extricate themselves. Lieutenant Ian Guild's 2 Platoon was subsequently moved into position to cover the withdrawal, and carrying their wounded the Australians successfully broke contact without suffering further losses. [32] A Company initially moved to a landing zone 120 metres (130 yd) below the ridgeline which had been cleared to allow the casualties to be evacuated, yet there were no helicopters available. As a result, the Australians had to look after their casualties until the following morning, and they proceeded further north to a night harbour as the area was pounded by artillery, aerial bombing and helicopter gunships. [31]

Healy assessed that his company had encountered a force of at least company-size. Later it became apparent that they had indeed contacted Company 238 which was tasked with protecting the U1 headquarters and to carry out operations in the Bien Hoa region. [31] Throughout the day Viet Cong reconnaissance parties, perhaps including those that had been contacted intermittently, had observed the approaching Australian force on a line leading directly to the U1 headquarters. During the fighting the Viet Cong company commander—Nguyễn Văn Bảo—had split his force into two, allocating one platoon to fight the advancing Australians, and the other two to protect the headquarters. Following the Australian withdrawal Văn Bảo had also withdrawn, pre-empting the ensuing barrage, yet the U1 base remained in communist hands. [18]

Fighting across the Song Dong Nai

US paratroopers under heavy fire during Operation Hump. US 1 503rd paratrooper Operation Hump SVN November 1965.PNG
US paratroopers under heavy fire during Operation Hump.

Meanwhile, across the river in the American AO the 1/503rd had uncovered a large Viet Cong bunker system and became involved in fierce fighting that had included desperate hand-to-hand combat, with both sides resorting to using bayonets. Throughout the morning the Australians had heard the increasing crescendo of firing as the battle raged; however, as neither they nor the 2/503rd had been called on to reinforce the 1/503rd they had pressed on. [27] The American paratroopers had engaged a well-equipped Viet Cong Main Force regiment, complete with khaki uniforms, steel helmets and Soviet automatic weaponry and small arms. The fighting across the Song Dong Nai continued into the afternoon, before subsiding into sporadic sniper and small arms fire in the later afternoon and early evening. [18] During the fighting, Specialist Lawrence Joel—a medic—distinguished himself tending to his wounded comrades while under heavy fire. He was subsequently awarded the Medal of Honor. [33]

Brumfield demanded the right to return to Hill 82 in order to destroy the bunker system and to recover the bodies of Parker and Gillson, and he and Major John Essex-Clark—the operations officer—began planning a battalion attack. [34] However, with American casualties rising and all available helicopters required for casualty evacuation, the planned operation was cancelled. [17] The thick jungle canopy compounded the issue, and Williamson decided to stage the casualties through an area secured by the Australians at LZ Princess. [29] Operation Hump concluded on 9 November, with the 1/503rd and 1 RAR being extracted by helicopter and returning to Bien Hoa in the late afternoon. [18] Following 1 RAR's return to Bien Hoa, Brumfield continued to petition for permission to conduct the operation. [35] A battalion attack was subsequently planned for 14 November, but Williamson later deferred it dependent on the availability of air and helicopter support, and the start date of the upcoming Operation New Life. Ultimately it was never conducted. [36]

Aftermath

Casualties

The Battle of Gang Toi was the first set-piece action between Australian and Viet Cong forces in the Vietnam War. [37] Australian casualties included two missing (presumed killed) and six wounded, and despite the efforts of their comrades, the bodies of the Australian dead were unable to be recovered. [25] Against these losses the Viet Cong had suffered at least six killed, one wounded and five captured. [38] Confronted by an equal sized force, dug-in in well-prepared defences, the Australians had performed creditably enough even if they had been forced to withdraw, leaving the battlefield to the Viet Cong. Despite inflicting heavier casualties on the communists than they had suffered themselves, many of the Australians were depressed at having left two soldiers behind, and they longed for the opportunity to return to Gang Toi. [18] In 2007, more than 40 years after the fighting, an Australian Vietnam veteran—Jim Bourke, MG—and a team of volunteers successfully located the remains of both Parker and Gillson. They had been hastily buried together in a weapon pit the day after the battle by Viet Cong soldiers, and with the assistance of the Australian and Vietnamese governments they were subsequently returned to Australia for burial. [39]

Assessment

Although A Company, 1 RAR had been mauled, the experience of the Australians at Gang Toi was relatively minor when compared to that of the Americans. During fierce fighting the 1/503rd had suffered 49 killed and 83 wounded, while more than 400 Viet Cong were believed killed. [37] American claims were later raised to over 700 killed when captured documents revealed the losses caused by artillery and air strikes. [35] Yet it was questionable as to whether such battles of attrition would be viable, while equally the American battalion had taken casualties far beyond what would have been politically acceptable for 1 RAR. [36] Indeed, their losses had been significant, and although claimed as a victory, the Americans had failed to secure the area even if the Viet Cong had temporarily surrendered control of the battlefield. Ultimately, the communists continued to use War Zone D as a major base area for the rest of the war. [40]

Brumfield considered Operation Hump to be the least successful operation in which the Australian battalion had participated, and he criticised it as being badly conceived from the start, and mounted with too little intelligence or prior reconnaissance. Indeed, from the initial landing zone being occupied by the Viet Cong, failures in the passage of information, the heavy losses suffered by the 1/503rd and the subsequent difficulties with casualty evacuation, the operation had not run smoothly. [36] The Australians were vengeful for their losses and wanted to return to collect their dead; however, with 1 RAR absorbed into other operations the planned battalion attack on Hill 82 never occurred. Regardless, further operations followed in the months afterwards, with 1 RAR subsequently employed on Operation New Life in November and December, and later Operation Crimp in the Ho Bo Woods in January 1966. [41] Operation Hump was Brumfield's last, with an old football injury forcing his evacuation to Australia in mid-November. He was subsequently replaced by Lieutenant Colonel Alex Preece. [42]

Subsequent operations

At the strategic level the ARVN and the South Vietnamese government had both rallied after appearing on the verge of collapse and the communist threat against Saigon had subsided, yet additional troop increases were required if Westmoreland was to adopt a more offensive strategy, with US troop levels planned to rise from 210,000 in January 1966 to 327,000 by December 1966. [43] The Australian government increased its own commitment to the ground war in March 1966, announcing the deployment of a two battalion brigade—the 1st Australian Task Force (1 ATF)—with armour, aviation, engineer and artillery support; in total 4,500 men. Additional Royal Australian Air Force (RAAF) and the Royal Australian Navy (RAN) force elements would also be deployed and with all three services total Australian strength in Vietnam was planned to increase to 6,300 personnel. [44] 1 RAR was subsequently replaced by 1 ATF which was allocated its own area of operations in Phuoc Tuy Province, thereby allowing the Australians to pursue operations more independently using their own counter-insurgency tactics and techniques. The task force arrived between April and June 1966, constructing a base at Nui Dat, while logistic arrangements were provided by the 1st Australian Logistic Support Group which was established at the port of Vung Tau. [45]

Notes

  1. McNeill 1993, p. 54.
  2. McNeill 1993, pp. 53–67.
  3. McNeill 1993, pp. 63–67.
  4. McNeill 1993, p. 67.
  5. Mangold & Penycate 1985, pp. 43–44.
  6. McNeill 1993, p. 66.
  7. McNeill 1993, p. 95.
  8. 1 2 Dennis et al 2008, p. 555.
  9. 1 2 McAulay 2005, p. 4.
  10. McNeill 1993, p. xxv.
  11. Faley 1999, pp. 34–36.
  12. McNeill 1993, p. 65.
  13. Kuring 2004, pp. 321–322.
  14. McNeill 1993, pp. 85–109.
  15. 1 2 Breen 1988, p. 103.
  16. 1 2 Breen 1988, p. 110.
  17. 1 2 3 Breen 1988, p. 109.
  18. 1 2 3 4 5 6 McNeill 1993, p. 147.
  19. 1 2 Coulthard-Clark 2001, p. 278.
  20. McNeill 1993, p. 141.
  21. McNeill 1993, pp. 141–142.
  22. Breen 1988, p. 111.
  23. 1 2 3 4 5 6 Breen 1988, p. 113.
  24. 1 2 3 McNeill 1993, p. 142.
  25. 1 2 Horner 2008, p. 175.
  26. McNeill 1993, pp. 142–144.
  27. 1 2 McNeill 1993, p. 144.
  28. 1 2 3 McNeill 1993, p. 145.
  29. 1 2 Breen 1988, p. 121.
  30. Breen 1988, p. 119.
  31. 1 2 3 4 5 McNeill 1993, p. 146.
  32. Breen 1988, p. 120.
  33. "Lawrence Joel, Medal of Honor recipient". Vietnam War (A-L). United States Army Center of Military History. 8 June 2009. Archived from the original on 25 December 2007. Retrieved 5 December 2007.
  34. Breen 1988, p. 126.
  35. 1 2 Breen 1988, p. 127.
  36. 1 2 3 McNeill 1993, p. 149.
  37. 1 2 Coulthard-Clark 2001, p. 279.
  38. McNeill 1993, p. 441.
  39. Ham 2007, p. 693.
  40. Ham 2007, p. 150.
  41. McNeill 1993, pp. 441–442.
  42. McNeill 1993, p. 150.
  43. McNeill 1993, p. 171.
  44. Horner 2008, p. 177.
  45. Dennis et al 2008, p. 556.

Related Research Articles

<span class="mw-page-title-main">Battle of Long Tan</span> 1966 battle of the Vietnam War

The Battle of Long Tan took place in a rubber plantation near Long Tân, in Phước Tuy Province, South Vietnam, during the Vietnam War. The action was fought between Viet Cong (VC) and People's Army of Vietnam (PAVN) units and elements of the 1st Australian Task Force.

<span class="mw-page-title-main">1st Australian Task Force</span> Joint military task force

The 1st Australian Task Force was a brigade-sized formation which commanded Australian and New Zealand Army units deployed to South Vietnam between 1966 and 1972. 1 ATF was based in a rubber plantation at Nui Dat, 8 kilometres (5.0 mi) north of Bà Rịa in Phuoc Tuy Province and consisted of two and later three infantry battalions, with armour, aviation, engineers and artillery support. While the task force was primarily responsible for securing Phuoc Tuy Province, its units, and the Task Force Headquarters itself, occasionally deployed outside its Tactical Area of Responsibility.

<span class="mw-page-title-main">Operation Crimp</span> A joint US-Australian military operation during the Vietnam War

Operation Crimp, also known as the Battle of the Ho Bo Woods, was a joint US-Australian military operation during the Vietnam War, which took place 20 kilometres (12 mi) north of Cu Chi in Binh Duong Province, South Vietnam. The operation targeted a key Viet Cong headquarters that was believed to be concealed underground, and involved two brigades under the command of the US 1st Infantry Division, including the 1st Battalion, Royal Australian Regiment which was attached to the US 173rd Airborne Brigade. Heavy fighting resulted in significant casualties on both sides, but the combined American and Australian force was able to uncover an extensive tunnel network covering more than 200 kilometres, at the cost of 8 Australians and 14 Americans killed and 29 Australians and 76 Americans wounded.

<span class="mw-page-title-main">Battle of Coral–Balmoral</span> 1968 battle during the Vietnam War

The Battle of Coral–Balmoral was a series of actions fought during the Vietnam War between the 1st Australian Task Force and the North Vietnamese People's Army of Vietnam (PAVN) 7th Division and Viet Cong (VC) Main Force units, 40 kilometres (25 mi) north-east of Saigon. Following the defeat of the PAVN/VC Tet offensive in January and February, in late April two Australian infantry battalions—the 1st and 3rd Battalions of the Royal Australian Regiment (RAR)—with supporting arms, were again deployed from their base at Nui Dat in Phước Tuy Province to positions astride infiltration routes leading to Saigon to interdict renewed movement against the capital. Part of the wider allied Operation Toan Thang I, it was launched in response to intelligence reports of another impending PAVN/VC offensive, yet the Australians experienced little fighting during this period. Meanwhile, the PAVN/VC successfully penetrated the capital on 5 May, plunging Saigon into chaos during the May Offensive in an attempt to influence the upcoming Paris peace talks scheduled to begin on the 13th. During three days of intense fighting the attacks were repelled by US and South Vietnamese forces, and although another attack was launched by the PAVN/VC several days later, the offensive was again defeated with significant losses on both sides, causing extensive damage to Saigon and many civilian casualties. By 12 May the fighting was over, and the PAVN/VC were forced to withdraw having suffered heavy casualties. US casualties were also heavy and it proved to be their most costly week of the war.

<span class="mw-page-title-main">Operation Hump</span> 1965 search-and-destroy operation by US and Australian forces during the Vietnam War

Operation Hump was a search and destroy operation initiated by United States and Australian forces on 5 November 1965, during the Vietnam War.

<span class="mw-page-title-main">Battle of Binh Ba</span>

The Battle of Binh Ba, also known as Operation Hammer, was a battle during the Vietnam War. The action occurred when Australian Army troops from the 5th Battalion, Royal Australian Regiment fought a combined force of People's Army of Vietnam (PAVN) and Viet Cong (VC), including a company from the PAVN 33rd Regiment and elements of the VC D440 Battalion, in the village of Bình Ba, 5 kilometres (3.1 mi) north of Nui Dat in Phuoc Tuy Province. The battle was unusual in Australian combat experience in South Vietnam as it involved fierce close-quarter house-to-house fighting, although the majority of enemy killed was through heavy artillery and air-bombardment. In response to PAVN/VC attempts to capture Binh Ba the Australians assaulted the village with infantry, armour and helicopter gunships, routing the VC and largely destroying the village itself. Such battles were not the norm in Phuoc Tuy, however, and the heavy losses suffered by the PAVN/VC forced them to temporarily leave the province. Although the Australians did encounter PAVN/VC Main Force units in the years to come, the battle marked the end of such large-scale clashes, and ranks as one of the major Australian victories of the war.

<span class="mw-page-title-main">Operation Bribie</span> 1967 battle in Vietnam (aka Battle of Ap My An)

Operation Bribie, also known as the Battle of Ap My An, was fought during the Vietnam War in Phuoc Tuy province between Australian forces from the 6th Battalion, Royal Australian Regiment and two companies of Viet Cong from D445 Battalion, likely reinforced by North Vietnamese regulars. During the night of 16 February the Viet Cong attacked a South Vietnamese Regional Force compound at Lang Phuoc Hai, before withdrawing the following morning after heavy fighting with South Vietnamese forces. Two hours later, a Viet Cong company was reported to have formed a tight perimeter in the rainforest 2 kilometres (1.2 mi) north of Lang Phuoc Hai, near the abandoned hamlet of Ap My An. In response, the Australians deployed a quick reaction force. Anticipating that the Viet Cong would attempt to withdraw, as they had during previous encounters, forces from the 1st Australian Task Force were inserted to block the likely withdrawal route in the hope of intercepting and destroying them.

<span class="mw-page-title-main">Operation Coburg</span> Battle of the Vietnam War

Operation Coburg was an Australian and New Zealand military action during the Vietnam War. The operation saw heavy fighting between the 1st Australian Task Force and North Vietnamese People's Army of Vietnam (PAVN) and Viet Cong (VC) forces during the wider fighting around Long Binh and Bien Hoa.

<span class="mw-page-title-main">Battle of Long Khánh</span> 1971 battle of the Vietnam War

The Battle of Long Khanh was fought during the Vietnam War between elements of 1st Australian Task Force and the Viet Cong (VC) and People's Army of Vietnam (PAVN) during Operation Overlord. The fighting saw Australian infantry from 3rd Battalion, Royal Australian Regiment attack a heavily fortified communist base camp in Long Khanh Province, while Centurion tanks providing close support crushed many bunkers and their occupants. Regardless, the VC fought hard to delay the Australian advance and although the bunker system was subsequently captured, along with a second system further south, the Australians suffered a number of casualties and the loss of a UH-1 Iroquois helicopter. With the Australians unable to concentrate sufficient combat power to achieve a decisive result, the bulk of the VC/PAVN force successfully withdrew intact, although they probably sustained heavy casualties in the process.

<span class="mw-page-title-main">Operation Toan Thang I</span>

Operation Toan Thang I was a U.S. Army, Army of the Republic of Vietnam (ARVN), 1st Australian Task Force and Royal Thai Volunteer Regiment operation conducted between 8 April and 31 May 1968 in the Vietnam War. The operation was part of a reaction to the Tet Offensive designed to put pressure on Vietcong (VC) and People's Army of Vietnam (PAVN) forces in III Corps.

<span class="mw-page-title-main">Battle of Hat Dich</span>

The Battle of Hat Dich was a series of military actions fought between an allied contingent, including the 1st Australian Task Force and the People's Army of Vietnam (PAVN) and Viet Cong (VC) during the Vietnam War. Under the code name Operation Goodwood, two battalions from 1 ATF deployed away from their base in Phước Tuy Province, operating against suspected PAVN/VC bases in the Hat Dich area, in western Phước Tuy, south-eastern Biên Hòa and south-western Long Khánh provinces as part of a large allied sweep known as Operation Toan Thang II. The Australians and New Zealanders conducted sustained patrolling throughout the Hat Dich and extensively ambushed tracks and river systems in the Rung Sat Special Zone, occupying a series of fire support bases as operations expanded. Meanwhile, American, South Vietnamese and Thai forces also operated in direct support of the Australians as part of the division-sized action.

<span class="mw-page-title-main">Battle of Suoi Bong Trang</span> Part of the Vietnam War

The Battle of Suoi Bong Trang was an engagement fought between US, Australian and New Zealand forces, and the Viet Cong and North Vietnamese Army during the Vietnam War. The battle occurred during Operation Rolling Stone, an American security operation to protect engineers building a tactically important road in the vicinity of Tan Binh, in central Binh Duong Province, 30 kilometres (19 mi) north-west of Bien Hoa airbase. During the fighting, soldiers from the US 1st Brigade, 1st Infantry Division and the 1st Battalion, Royal Australian Regiment, which had been attached for the operation, fought off a regimental-sized Viet Cong night assault. Repulsed by massed firepower from artillery and tanks, the Viet Cong suffered heavy casualties and were forced to withdraw by morning. After the attack, the Americans and Australians made no attempt to pursue the Viet Cong, focusing on securing the battlefield and evacuating their own casualties. The Viet Cong continued to harass the American sappers with occasional sniper and mortar fire, but these tactics proved ineffective, and the road was completed by 2 March.

<span class="mw-page-title-main">3rd Battalion, 319th Field Artillery Regiment</span> Military unit

The 3rd Battalion, 319th Field Artillery Regiment is the field artillery battalion that directly supports the 1st Brigade Combat Team, 82nd Airborne Division. Known as the "Gun Devils", 3–319th AFAR has participated in battles from World War I to the current day, and is one of the most highly decorated field artillery units in the United States Army. The battalion's mission is "3-319th AFAR stands ready to deploy worldwide within 18 hours of notification, execute a parachute assault and conduct full-spectrum operations. Specifically, the battalion will provide responsive lethal and nonlethal fires in support of forcible entry and airfield seizure, and integrate and synchronize the effects of fires to achieve the 1BCT commander's intent."

<span class="mw-page-title-main">Battle of Suoi Chau Pha</span> Part of the Vietnam War

The Battle of Suối Châu Pha was fought during the Vietnam War between Australian troops and the Việt Cộng. The battle took place during Operation Ballarat, an Australian search and destroy operation in the eastern Hát Dịch area, north-west of Núi Đất in Phước Tuy province. Following a covert insertion the day before which had caught a number of Việt Cộng sentries by surprise, A Company, 7th Battalion, Royal Australian Regiment had patrolled forward unaware of the presence of a large Việt Cộng main force unit nearby. Clashing with a reinforced company from the Việt Cộng 3rd Battalion, 274th Regiment, a classic encounter battle ensued between two forces of roughly equal size. Fought at close quarters in dense jungle amid a heavy monsoon rain, both sides suffered heavy casualties as neither was able to gain an advantage. Finally, after a battle lasting several hours, the Australian artillery proved decisive and the Việt Cộng were forced to withdraw, dragging many of their dead from the battlefield after having suffered crippling losses.

<span class="mw-page-title-main">D445 Battalion</span> Military unit

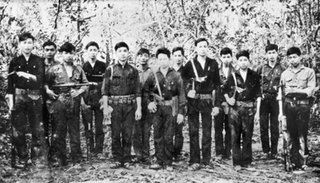
The 445th Battalion, also known as the D445 Provincial Mobile Battalion or the Ba Ria Battalion, was a local force battalion of the Viet Cong (VC) during the Vietnam War.

<span class="mw-page-title-main">Long Tan Cross</span>

The Long Tan Cross is a memorial which was erected by the 6th Battalion, Royal Australian Regiment on 18 August 1969 to mark the site of the Battle of Long Tan, which was fought three years earlier during the Vietnam War. While the cross was removed following the Communist victory in 1975 and used to commemorate a priest, it was recovered by the Đồng Nai Province Museum in 1984 and placed on display. A replica cross was also erected on the battlefield during the 1980s, and is frequently visited by Australian Vietnam War veterans. The original Long Tan Cross was gifted to Australia in 2017 and placed on permanent display at the Australian War Memorial in Canberra.

This is an order of battle listing the Australian and Viet Cong forces involved in the Battle of Long Tan which occurred in Phuoc Tuy Province, South Vietnam on 18 August 1966.

<span class="mw-page-title-main">Assessment of the Battle of Long Tan</span>

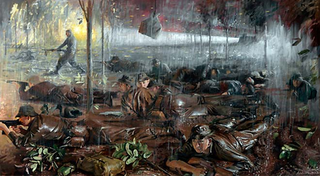
The Battle of Long Tan took place on 18 August 1966 in Phuoc Tuy Province, South Vietnam during the Vietnam War between Viet Cong and North Vietnamese units from the Viet Cong 275th Regiment, possibly reinforced by at least one North Vietnamese battalion, and D445 Provincial Mobile Battalion, and Australian forces from D Company, 6th Battalion, Royal Australian Regiment. Although the Australians were heavily outnumbered and almost overwhelmed by the Viet Cong the battle ended in a decisive victory for them, establishing their dominance over the province. This perspective however sharply contrasts with competing interpretations in which the D445 Battalion had garnered strong political support in Phuoc Tay. Furthermore, the local D445 Battalion was redeployed northwards against the newly deployed 11th Armored Cavalry Taskforce a month later and so the true significance of the battle is called into question.

Operation Marauder was an operation conducted by the 173rd Airborne Brigade and the 1st Battalion, Royal Australian Regiment in the Plain of Reeds, Mekong Delta, lasting from 1 to 8 January 1966.

<span class="mw-page-title-main">Operation Hardihood</span>

Operation Hardihood was a security operation conducted from 16 May to 8 June 1966 during the Vietnam War by the U.S. 503rd Infantry Regiment, the 1st Battalion, Royal Australian Regiment (1RAR) and the 5th Battalion, Royal Australian Regiment in Phước Tuy Province, South Vietnam to secure the area around Nui Dat for the establishment of a base area for the 1st Australian Task Force.

References