Siege of Eshowe

Last updated

Siege of Eshowe
Part of the Anglo-Zulu War
Wagons crossing Amatikulu drift on the way to Eshowe.jpg
Wagons crossing Amatikulu drift on the way to Eshowe
Date22 January – 3 April 1879
Location 28°53′34″S31°29′49″E / 28.892767°S 31.497075°E / -28.892767; 31.497075
Result British victory
Belligerents
Flag of the United Kingdom.svg British Empire Zulu Kingdom
Commanders and leaders
Charles Pearson Dabulamanzi kaMpande
Strength
1,700 (No. 1 Column)
5,670 (Relief Column)
12,000
Casualties and losses
137 killedc.1,000 killed
South Africa adm location map.svg
Red pog.svg
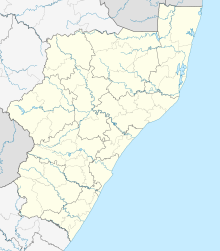
Location in present-day South Africa
South Africa KwaZulu-Natal location map.svg
Red pog.svg
Siege of Eshowe (KwaZulu-Natal)

The siege of Eshowe took place during the Anglo-Zulu War of 1879. The siege was part of a three-pronged attack on the Zulu Impis of king Cetshwayo at Ulundi. After an incursion as far as Eshowe (then also known as Fort Ekowe or kwaMondi) [1] Colonel Charles Pearson was besieged there for two months by the Zulus.

Contents

Prelude

No. 1 Column

No. 1 Column of the British invasion force, under Colonel Charles Pearson, had been ordered to establish an advanced base at Eshowe. He was to move his forces there rapidly in order to prevent the buildings from being burnt. After occupying Eshowe, Pearson was to entrench it and establish a supply base. He was to confine his operations to between Eshowe and the Tugela River until word of the other two invading columns' progress reached him. [2] The force crossed the Tugela from Natal into Zululand on 12 January 1879. The advance was unopposed until 22 January, when a Zulu force attempted to bar their way. The British were camped about 4 mi (6.4 km) south of the Inyezane River, which they had crossed the previous day, beneath a steep ridge with three spurs leading down towards the river and surrounded by scrub. A prominent knoll sat about halfway and there was a small kraal near the left of the crest.

Inyezane

Shortly after 08:00 a small number of Zulus appeared near the knoll on the ridge and a company of the Natal Native Contingent (NNC), under Lieutenant Hart, were sent up the spur after them. While this company gave chase a mass of Zulus appeared over the crest of the ridge and began pouring downwards. These men were the left "horn" of a 6,000 strong force, dispatched at the same time as the army that engaged the British at Isandlwana, who were preparing just over the crest, to attack the British camp. This left horn had been prompted into a premature attack by the advance of Lieutenant Hart's company and in the face of this advance the NNC fled, leaving their European officers and NCOs to make a fruitless stand before being swept aside. [3] As soon as Hart and his men began firing, the camp prepared for defence, forming a hasty firing line. A naval company and two companies of Buffs with a Gatling gun and several 7-pounders moved up to the knoll, opening up across the advancing Zulu column. When the Zulus emerged from scrub and began their assault on the camp, they were subjected to massed fire from the flank and front; the Zulus wavered and then withdrew the way they had come.

While the left horn was being repulsed, the rest of the Zulu impi appeared over the crest. The kraal was taken and switching their guns to focus on it, the British force that had attacked the flank of the left horn advanced up the slope and captured the kraal. This position allowed the British to move the Gatling gun onto the crest where its rapid fire soon drove the Zulus off the centre and left end of the ridge, as the British mounted troops came up the right-hand spur to complete the action. The counter-attack resulted in 10 British killed and 16 wounded. The Zulu impi withdrew with 350 killed.

Eshowe

Pearson continued his march unhindered and the following day reached the mission near Eshowe at 28°53′34″S31°29′49″E / 28.892767°S 31.497075°E / -28.892767; 31.497075 (Norwegian Lutheran mission) , 2,000 ft (610 m) above sea level. Eshowe consisted of a deserted church, school and the house of a Norwegian missionary. Low hills surrounded it about a quarter of a mile away to the north, east and west but to the south the Indian Ocean could be seen. Pearson sent a group of empty wagons with escorts to collect fresh supplies from the Lower Drift, while the rest of his force began to dig in. The next day, 24 January, bore a disturbing message for Pearson that Colonel Anthony Durnford's No. 2 Column had been wiped out in the Middle Drift, leaving the Lower Drift behind Eshowe in grave danger. If the Zulus took the Lower Drift, Eshowe would be cut off and there would be nothing between the Zulu Army and Natal. [4]

Two days later, Lord Chelmsford contacted Pearson. Without giving any details of the disaster at the Battle of Isandlwana he informed him that all orders were cancelled and that he was to take such as action as he thought fit to preserve his column, including withdrawal from Eshowe if necessary. If he withdrew, he was to hold the bridgehead at the Lower Drift but he might be attacked by the whole Zulu Army. [5] Pearson had no precise information on the whereabouts of the Zulu and although his defences around the mission would soon be complete, it was not an ideal position to defend. His force had plenty of ammunition but other supplies were insufficient and the consensus of his subordinates was to pull back to the Lower Drift. The decision to stay was settled on when news arrived of the return of the supply wagons, with five further companies as reinforcement from the Lower Drift.

Siege

Remains of foundations from the siege fort in Eshowe The old fort foundations (KwaMondi).jpg
Remains of foundations from the siege fort in Eshowe

The fort enclosing the abandoned Norwegian Lutheran mission was roughly rectangular, 200 yd × 50 yd (183 m × 46 m), with loopholed walls 6 ft (1.8 m) high, and was surrounded by a broad ditch in which sharpened sticks were embedded. A second line of defence, should the outer rampart fall, was formed by laagering the wagons inside the walls. A horse and cattle kraal was constructed, as was an abattis; a field of fire was cleared all round out to 800 yd (730 m). The garrison numbered 1,300 soldiers and sailors, plus 400 wagoners.

The appearance of large bodies of Zulu on the surrounding hills on 2 February, although they retreated under shelling from the 7-pounders, compelled Pearson to request reinforcements. A week later, he learned for the first time the full extent of the centre column's defeat at Isandlwana and was told that there could be no reinforcement. Pearson considered withdrawing part of his garrison, if Chelmsford agreed, but receiving no response and no further runners, it became clear that Eshowe had been cut off. The garrison would run out of provisions by the beginning of April. [6]

February passed with no Zulu attack, save for sniping attacks and skirmishes between patrols. The beginning of March led Pearson to attack a kraal 7 miles away, to keep the soldiers from idling. The next day a heliograph was spotted signalling from Fort Tenedos and a makeshift apparatus allowed Eshowe to reply. The garrison learnt that a relief force would depart the Lower Drift on 13 March and that they were to advance to the Nyezane to meet it. This was cheering news for the garrison, with rations running low and sickness having killed 20 men. As the garrison prepared to mount the planned sortie on 13 March, however, another message advised a delay in the arrival of the relief column until 1 April. [7]

Relief Column

Lord Chelmsford led the relief column, consisting of 3,390 Europeans and 2,280 Africans to Eshowe. The artillery with the column consisted of two 9-pounder guns, four 24-pounder Congreve rockets tubes and two Gatling guns. The progress was slow, as in addition to taking a roundabout route to avoid ambush, the rivers they had to traverse were swollen by heavy rains. By the evening of 1 April, Pearson's observers at Eshowe could see the relief column laagering ten miles away from the fort. [8] The laager was sited on a 300-foot ridge running roughly west–east. West of the ridge, the ground dipped, only to rise again to the 470-foot Umisi Hill. The ground sloped away in all directions, allowing a good field of fire. A trench surrounded a waist high wall of earth, which enclosed 120 wagons formed a square with sides of 130 yards in length. Here the relief column fought the Battle of Gingindlovu, a British victory, before continuing on to Eshowe.

Eshowe relieved

On 3 April, the relief column entered Eshowe, led by the pipers of the 91st Highlanders. The two-month siege had been lifted. Chelmsford concluded that Eshowe did not need to be retained, and the laboriously constructed defences were demolished. Bivouacking on the first night after their departure from it on 6 April, Pearson's men could see that the Zulus had set Eshowe alight. [9]

See also

Related Research Articles

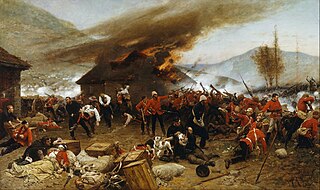
<span class="mw-page-title-main">Battle of Rorke's Drift</span> 1879 battle in the Anglo-Zulu War

The Battle of Rorke's Drift, also known as the Defence of Rorke's Drift, was an engagement in the Anglo-Zulu War. The successful British defence of the mission station of Rorke's Drift, under the command of Lieutenants John Chard of the Royal Engineers and Gonville Bromhead, of the 24th Regiment of Foot began once a large contingent of Zulu warriors broke off from the main force during the final hour of the British defeat at the day-long Battle of Isandlwana on 22 January 1879, diverting 6 miles (9.7 km) to attack Rorke's Drift later that day and continuing into the following day.

<span class="mw-page-title-main">Anglo-Zulu War</span> British colonial war in 1879

The Anglo-Zulu War was fought in 1879 between the British Empire and the Zulu Kingdom. The most famous battle of the War was the Defense of Rorke's Drift. Following the passing of the British North America Act of 1867 forming a federation in Canada, Lord Carnarvon thought that a similar political effort, coupled with military campaigns, might lead to a ruling white minority over a black majority, which would provide a large pool of cheap labour for the British sugar plantations and mines, encompassing the African Kingdoms, tribal areas and Boer republics into South Africa. In 1874, Sir Bartle Frere was sent to South Africa as High Commissioner for the British Empire to effect such plans. Among the obstacles were the armed independent states of the South African Republic and the Kingdom of Zululand.

<span class="mw-page-title-main">Cetshwayo</span> King of the Zulu Kingdom (1826–1884)

Cetshwayo kaMpande was the king of the Zulu Kingdom from 1873 to 1884 and its Commander in Chief during the Anglo-Zulu War of 1879. His name has been transliterated as Cetawayo, Cetewayo, Cetywajo and Ketchwayo. Cetshwayo consistently opposed the war and sought fruitlessly to make peace with the British and was defeated and exiled following the Zulu defeat in the war. He was later allowed to return to Zululand, where he died in 1884.

<span class="mw-page-title-main">Battle of Isandlwana</span> 1879 battle of the Anglo-Zulu War

The Battle of Isandlwana on 22 January 1879 was the first major encounter in the Anglo-Zulu War between the British Empire and the Zulu Kingdom. Eleven days after the British invaded Zululand in Southern Africa, a Zulu force of some 20,000 warriors attacked a portion of the British main column consisting of approximately 1,800 British, colonial and native troops with approximately 350 civilians. The Zulus were equipped mainly with the traditional assegai iron spears and cow-hide shields, but also had a number of muskets and antiquated rifles.

<span class="mw-page-title-main">Frederic Thesiger, 2nd Baron Chelmsford</span> British Army officer (1827–1905)

General Frederic Augustus Thesiger, 2nd Baron Chelmsford, was a British Army officer who rose to prominence during the Anglo-Zulu War, when an expeditionary force under his command suffered a decisive defeat at the hands of a Zulu force at the Battle of Isandlwana in 1879. Despite this defeat, he was able to score several victories against the Zulus, culminating in the British victory at the Battle of Ulundi, which ended the war and partly restored his reputation in Britain.

<span class="mw-page-title-main">Battle of Kambula</span> 1879 battle of the Anglo-Zulu War in Kambula, South Africa

The Battle of Kambula took place on 29 March 1879, during the Anglo-Zulu War, when a Zulu military force attacked the British camp at Kambula, having routed the mounted element of the British force at the Battle of Hlobane the day before. The battle was a decisive Zulu defeat and the Zulu warriors lost their belief in victory. The war ended after the Zulu defeat at the Battle of Ulundi on 4 July 1879.
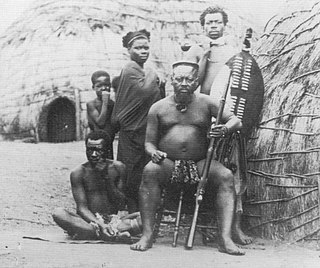
<span class="mw-page-title-main">Ntshingwayo Khoza</span>

Ntshingwayo kaMahole of the Khoza was the commanding general (inDuna) of King Cetshwayo's Zulu Army during the first Anglo-Zulu War.

<span class="mw-page-title-main">Battle of Hlobane</span> Battle of the Anglo-Zulu War

The Battle of Hlobane took place at Hlobane, near the modern town of Vryheid in KwaZulu-Natal, South Africa during the Anglo-Zulu War.

<span class="mw-page-title-main">Battle of Ulundi</span> Last major battle of the Anglo-Zulu War

The Battle of Ulundi took place at the Zulu capital of Ulundi on 4 July 1879 and was the last major battle of the Anglo-Zulu War. The British army broke the military power of the Zulu nation by defeating the main Zulu army and immediately afterwards capturing and burning the royal kraal of oNdini.

<span class="mw-page-title-main">Battle of Gingindlovu</span> Battle of the Anglo-Zulu War

The Battle of Gingindlovu (uMgungundlovu) was fought on 2 April 1879 between a British relief column sent to break the Siege of Eshowe and a Zulu impi of King Cetshwayo.

Lieutenant General Sir Charles Knight Pearson was a military commander in the British Army during the Anglo-Zulu War. Pearson was born in Somerset to Commander Charles Pearson of the Royal Navy. After buying the rank of Ensign in the 99th Regiment of Foot in 1852, Pearson served during the Crimean War where he was Mentioned in Despatches. After steadily rising through the ranks, Pearson was sent to South Africa to command a battalion of the 3rd Regiment of Foot. After retiring for a short period, he rejoined the Army after the outbreak of the Zulu War. Pearson was placed in command of a column of infantry which then became besieged at Eshowe for 70 days until Lord Chelmsford relieved them. After the war, Pearson became Governor and Commandant of the Royal Victoria Hospital, Netley, then commander of forces in the West Indies, before retiring in 1885. Pearson died in 1909.

<span class="mw-page-title-main">Dabulamanzi kaMpande</span> Zulu commander (1839-1886)

Dabulamanzi kaMpande was a Zulu commander for the Zulu kingdom in the Anglo-Zulu War. He is most noted for having commanded the Zulus at the Battle of Rorke's Drift. He was a half-brother of the Zulu king Cetshwayo.
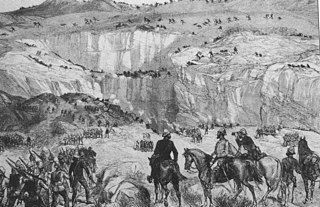
<span class="mw-page-title-main">Action at Sihayo's Kraal</span> 1879 skirmish in the Anglo-Zulu War

The 12 January 1879 action at Sihayo's Kraal was an early skirmish in the Anglo-Zulu War. The day after launching an invasion of Zululand, the British Lieutenant-General Lord Chelmsford led a reconnaissance in force against the kraal of Zulu Chief Sihayo kaXongo. This was intended to secure his left flank for an advance on the Zulu capital at Ulundi and as retribution against Sihayo for the incursion of his sons into the neighbouring British Colony of Natal.
<span class="mw-page-title-main">Natal Border Guard</span> British Empire auxiliary force during Anglo-Zulu war

The Natal Border Guard was an auxiliary force levied for the defence of the Colony of Natal during the Anglo-Zulu War of 1879. British military commander Lord Chelmsford had intended to raise a large auxiliary force to support his invasion of the Zulu Kingdom but was opposed by the civilian government of the Colony of Natal, led by its governor Henry Ernest Gascoyne Bulwer, who would have to finance the unit. Bulwer eventually allowed a smaller force to be raised with the stipulation that it not be deployed outside of Natal. This unit was to serve only on a part-time basis, receive no training and fight with the traditional weapons of spear and shield.

<span class="mw-page-title-main">Natal Native Pioneer Corps</span> British engineering unit during Anglo-Zulu war

The Natal Native Pioneer Corps, commonly referred to as the Natal Pioneers, was a British unit of the Zulu War. Raised in November/December 1878 the unit served throughout the war of 1879 to provide engineering support to the British invasion of Zululand. Three companies were formed each comprising around 100 men and clad in old British Army uniforms. The units served at the battles of Isandlwana, Eshowe and Ulundi.

<span class="mw-page-title-main">Sihayo kaXongo</span> Zulu chief (c. 1824 – 1883)

Sihayo kaXongo was a Zulu inKosi (chief). In some contemporary British documents he is referred to as Sirhayo or Sirayo. He was an inDuna (commander) of the iNdabakawombe iButho and supported Cetshwayo in the 1856 Zulu Civil War. Under Cetshwayo, Sihayo was a chief of a key territory on the border with the British Colony of Natal and had a seat on the iBandla. Sihayo was an Anglophile who wore European clothes and maintained friendly relations with trader James Rorke who lived nearby at Rorke's Drift. By 1864, Sihayo was head of the Qungebe tribe and that year agreed a new western border of the kingdom with Boer leader Marthinus Wessel Pretorius.

<span class="mw-page-title-main">Zungeni Mountain skirmish</span> 1879 skirmish between British and Zulu forces

The Zungeni Mountain skirmish took place on 5 June 1879 between British and Zulu forces during the Second invasion of Zululand in what is now part of South Africa. British irregular horse commanded by Colonel Redvers Buller discovered a force of 300 Zulu levies at a settlement near the Zungeni Mountain. The horsemen charged and scattered the Zulu before burning the settlement. Buller's men withdrew after coming under fire from the Zulu who had threatened to surround them.

<span class="mw-page-title-main">Zungwini Mountain skirmishes</span> Series of skirmishes between British and Zulu forces

The Zungwini Mountain skirmishes took place on 20, 22 and 24 January 1879 during the Anglo-Zulu War. The mountain was a stronghold of the AbaQulusi Zulu tribe, who were reinforced by the forces of exiled Swazi prince Mbilini waMswati. The mountain lay near the proposed route of advance of a British column under Lieutenant-Colonel Evelyn Wood, one of three that marched on the Zulu capital, Ulundi, from early January. Aware that the other columns had made less progress Wood, who had halted to fortify a camp at Tinta's Kraal, decided to deal with the abaQulusi strongholds.

<span class="mw-page-title-main">Richard Thomas Glyn</span> British Army officer (1831–1900)

Lt Gen Richard Thomas Glyn was a British Army officer. He joined the 82nd Regiment of Foot by purchasing an ensign's commission in 1850. Glyn served with the regiment in the Crimean War and rose in rank to captain before transferring to the 24th Regiment of Foot in 1856. He served with that regiment in the Indian Mutiny and was appointed to command it in 1872. In 1875 he accompanied the 1st battalion of the regiment on service in the Cape Colony and fought with them in the 9th Cape Frontier War of 1877–78. He was appointed a Companion of the Order of the Bath after the war.
<span class="mw-page-title-main">Fort Pearson</span> Fort in modern-day South Africa

Fort Pearson was a fortification constructed by the British on the Natal side of the border with Zululand in the lead up to the 1879 Anglo-Zulu War. An earthen redoubt on a 300-foot (100 m) high cliff overlooking the Tugela River, the fort and its two external redoubts commanded an important river crossing. The crossing was used by one of the columns of the first invasion of January 1879, that was then besieged at Eshowe in Zululand. The crossing was used again by the Eshowe relief column in March and the second invasion in April. The fort was strengthened in April 1879 and connected to Pietermaritzburg by telegraph by June. The war was won by the British in July but the fort was briefly occupied again by British troops in 1883 during the Third Zulu Civil War.

References

Bibliography